If you want to create a quote or invoice template, follow these steps or watch this tutorial:
1) Go to Biz Setup > Quote Template
2) Click on+ Add new template
Select
one of the 4 editable templates - These templates are the base templates for customizing your own template.
Edit mode - On
the left side of the screen is where you will design, edit and create your
template.

View mode - On the right side of the screen is where you can visualize your design and changes.

Visualization menu - From this menu, you can see how clients visualize the template as:
- Quote in the body of the Email
- Invoice in the body of the Email
- Quote attached to the email in PDF format
- Invoice attached to the email in PDF format

IMPORTANT!! The text and content that you see in edit mode and view mode is just sample text. This content will be replaced automatically every time with your client, business, and products information when sending a quote.
In the edit mode, you won't see the changes made to the template, to visualize these changes you must do it in the view mode that is located on the right side of your screen.
NOTE: When you send a quote or invoice to your client, it will ALWAYS come with an attached PDF. This file can be used as a presentation of your business or services along with your quote. Later, I will show you how to create it.
A) Click on Save or send a test by email.
In
this guide, we took template # 2

NOTE: You can customize each section by clicking on the color palette of the section to be edited.
C) Attach a file to the
template
You
can attach one or more files to your template. Each time you send the template
the selected files will be sent along with it.

Click on add a
file, then on the "+" sign or select a file from your list and save.
In
this section, you can write a text that will be displayed in the upper part of
the body of the email, before the quote. If you do not want to display a text,
leave it blank.

The
text can be automatically personalized by using labels like:
First Name, Last Name, among others. Select the label, copy the value and paste
it into your text. The
label will be substituted by customer information.
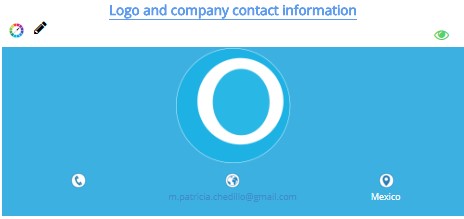
E) Logo and business
information section
F) Fiscal information
section
G) Customer contact
information section
H) Quote and Invoice
information
I) Products and services
information


From the new window select the
columns you want to hide.
J) Prices and comments section
K) Predefined clauses
section
L) Dates and time Section
You
can change the font colors and you can customize the date and time description.
M) Business account
information
M) Payment information
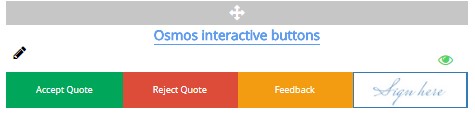
O) Electronic
Signature
The last section, the electronic signature appears as an image. By
clicking on this image within a quote or invoice, the client is able to e-sign
from any device connected to the internet by using his or her finger or the
mouse on the computer.